Monday, May 13, 2013

Kids Shorts

Sorry for the lack of posts!
I've been pretty tired these days.
I've made lots of stuff 
but I am lazy forget to take photos 
of what I am actually working on. 

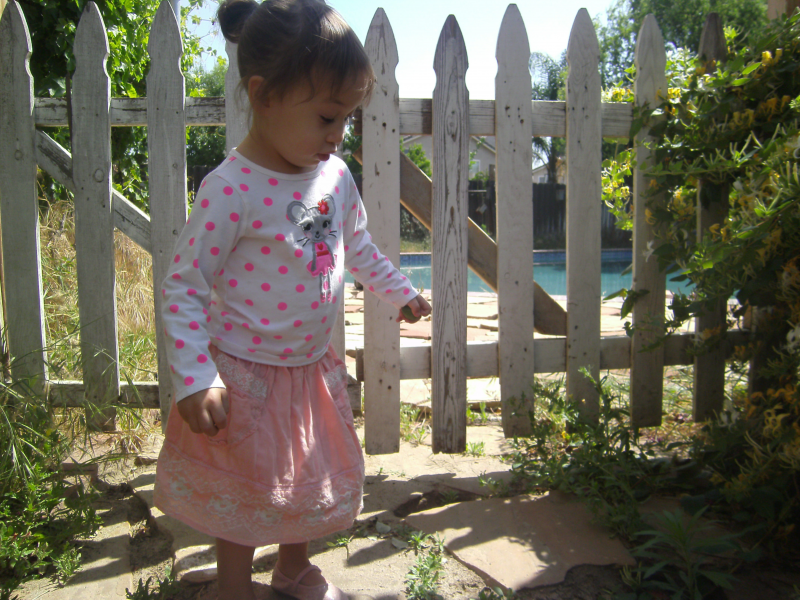
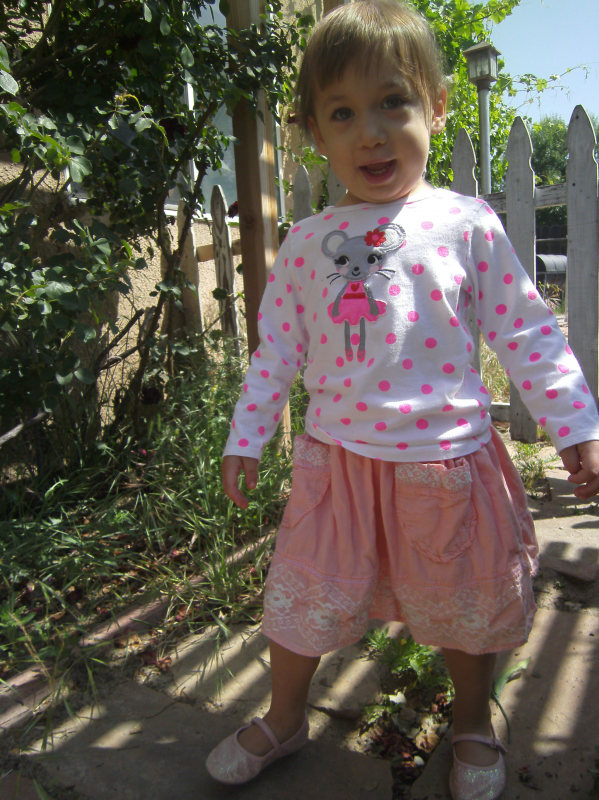
Here are some shorts I made a week ago 
for my 3 year old lady. 
I used the bottom-hem cut offs from a pair of pants.
Cut off scraps courtesy of my Mama.

Let's get a little sidetracked for a moment:
My mom is Amazing!
She should actually have her own blog
because she's one of the most creative people
I have ever met!
She is an incredible inspiration to me!!
Something to strive for!
Here's just one of her Pinterest boards
in case you wanted to know.
She's great! =]


Leona Breck

I'm probably in a Mommy-I-love-you! mood 
because of Mother's Day
and because i'm always in her sewing room 
making these projects to share with all you lovelies out there!

Back to the project!
 You readers are pretty smart 
so i'm probably not going to say a lot about these. 

If you have never made pajama pants before 
(which is usually project numero uno when you start sewing) 
try making some just ONCE 
and you will forever know the basics of making shorts and pants. 
Okay, here we go!


The End =]
Thanks for reading!
As always, post any questions 
or comments you may have!


Monday, May 6, 2013

Seriously Easy Maxi Dress

I remember when I first saw this Boho Maxi Dress. (<--link)
I am certain you have seen it too.

I liked the idea of this dress.
BUT I have never tried to make it or anything similar to it.
Why? 
It seems easy enough
And comfortable
And CUTE! 
So why would I refuse to make this maxi-beauty?

I just have one problem: I'm short. 
Long dresses tend to make me look...overwhelmed. 
I usually stay far away from them! 
And I mean FAR away!!!
I even have a few maxi skirts that are trendy and fashionable.
I don't even wear those very often.

But
I knew the day would come. 
I would attempt to make something that I might absolutely hate.

 That day was today.
I had some black fabric laying around  
and this dress was supposed to take 10-15 minutes 
so how could I argue against trying it out?

Even if I messed it up, I could just turn it into a skirt. 

And, let me tell you...
Wow
Just, wow.

I never would have suspected that this would have turned out the way it did! 
Not only do I love it
Not only did it take me 10 min to make 
(seriously, this was so fast)
I want to make fifteen more of these!

Seriously, it's that awesome!
So please do yourself a favor
and make one (or fifteen) of these beauties!

You know this thing is bomb because i'm posting pictures of myself
with mirror pictures.
We're going old school with myspace style pics!

Bam!
 

I seriously feel amazing wearing this baby!


It even has some nice Dolman sleeves


Here's what I did: I followed the tutorial (link to pin at beginning of post).
I took a shirt I already had and traced the neckline according to the shirt.
I cut the sleeves 6 inches instead of 8 inches per tutorial suggestion. 

I also started out with less fabric (40 inches). 
This wasn't a style choice. It's just what I had on hand.
So if you wanted to create the same silhouette for yourself,
take your widest measurement at hips and add 4-5 inches. 
That is your total width.

I sewed one seam down the two raw edges.
I then rotated the dress so the side-seam ran down the center of the back.

So this dress only has one back seam instead of two side seams.
Sew the top seam. Cut the neck, sleeves and bottom to desired length.
 Add belt, necklace, and continue to look Amazing!

Done and Done!
 

Thanks for reading!


Wednesday, May 1, 2013

Shirt to Girl's Skirt

 I know I said I would show you Sophia's matching skirt
and i'll definitely get to that at some point
but she's usually sleeping when I think about taking pictures.

Anyway, here's a cute skirt I made for Elli
out of a Tank Top I had laying around. 

Ta-Da!


Twirly Girly!


Closeup of the front


Here's the instructions:

Cut the bottom half off of a tank top (Baby doll type works best). 
Make it into an elastic skirt. 
There's many tutorials out there telling you how to do this 
so go ahead and google it =]

Optional: Take the top half and cut out some pockets. 
I love pockets on skirts! And so does Elli!
 

Pockets in action!


She's happy to wear this coral skirt to play!


That's it! 
It was so simple and a great way to use a cute shirt I had lying around. 
Seriously, You can use anything to make kids clothes!
 Thanks for reading!


Wednesday, April 24, 2013

Elli's Pink Dress

Here's a dress I made for Elli for church.


I love this dress! It didn't take long to make.
It's simple.
It's beautiful!


Here's the back. I even put a zipper in this one. Haven't done one of those since 2010.


The collar is made from white ribbon.
I gathered the middle, pinned to the neckline and sewed. 


Here's what I did basically. I took a pattern for a simple A-line dress. 

Look familiar? Yes, It's the same pattern from the gathered knit dress.
I don't know if it's resourceful or lazy but probably lazy that I use
the same pattern over and over until it basically falls apart. Anyway, take your pattern.

Cut out the front and back pieces. 
Cut out those same pieces again but cut like the picture below.

Do this to the front and back. This will make your zipper stronger 
and allow you to line your dress and not have to fold the neckline and armholes. 
Trust me, it's easier to just cut again and sew!
The pieces you should end up with

 Sew the lining just like you sewed your dress. Right sides together, sewing the sides and bodice tops together. Sew into your dress. Add a zipper. Embellish as you like!


Happy Girl in a Happy Dress!  

Thanks for reading!
Next post, I'll show you the matching skirt I made for sister Sophia


Tuesday, April 23, 2013

Knit Summer Dress

I found this dress over on Pinterest


Perfect for the summer time!
I thought Elli (my 3 year old) would love to play in this little dress.
I didn't want to buy it because that requires money so I decided to make my own!

And here it is!
Front

Back

Here's what I did. Take any dress pattern that will fit your girl (or yourself I suppose) that has sleeves. I used this pattern here for the pink dress on the left.

Cut out the front and back pieces only. I wanted to have the bottom longer, flowy and fun for running around in. So here's what I basically did with my pattern. Excuse my crappy amateurish drawing.

Sew your dress like normal. Right sides together, hem, etc.
Next you will add the sleeves.

Sorry there's no pictures of me making them so I hope this makes sense.

You MAKE the sleeves by cutting 4 long strips of fabric, preferably longer than your arm hole width, and sew right sides together. Turn right side out. Attach to arm holes and sew, adjusting the length as necessary. 

Lastly, you add your elastic.

Cut one long strip of fabric approx 2 times the width of your elastic. The more room you have to sew, the better! Pin it straight across where you want the elastic to go. Sew one long stitch on the top of your strip. Sew another stitch next to it. The distance between the two long stitches will be the elastic width. Stop about 1 inch before your second long stitch is complete. Insert elastic. Sew the elastic ends together. Close the hole. 
And there you have it!

Ta-Da!

 Pin on Pinterest, Pin with needles and sew!
Thanks for reading! Let me know if you have any questions!


Monday, April 22, 2013

Welcome!

I hope to post some pictures really soon! This blog is taking Pinterest sewing ideas and creating them in real life. I'll link the tutorials and answer questions about them. Please feel free to message me with any questions you may have! I've been sewing for over 10 years and I LOVE to make clothes for me and my girls! Please enjoy! =]